HOW TO SUBMIT AND SHOOT VIDEO
HOW TO SUBMIT VIDEO
1) Go to ScoutU.com/video and fill out the form with what clips you want on your video(s) with timestamps and in what order.
2) Send video clip links to video@ScoutU.com (see tips below) or mail SD card/flash drive to ScoutU, 4974 Seton Place, Greendale, WI 53129
Tips for sending in video to ScoutU:
- Do NOT email or text video files (this downgrades the quality and sometimes the email won’t be received if the files are too big). Upload them to an online cloud service, like Google Drive or OneDrive, and email the shareable links for us to download the video(s) to video@ScoutU.com
- If you have a lot of video that is several gigabytes in file size, it’s best to mail the video on a flash drive/SD card, rather than uploading to a cloud service, which can literally take days for you to upload and a long time for us to download once we receive it. If you only have a few small files to send, then uploading to a cloud service is OK.
- YouTube and HUDL Videos: Email the links to the video(s) to video@ScoutU.com
- Returning videos: With everyone having access to YouTube, HUDL, cloud-based storage and easy flash drive/SD card copy creation, it is very important that you know that ScoutU will not return video materials received for editing. So make sure that you keep copies of your originals before sending them to us. If a need arises that requires originals for editing, we will be happy to return them to you, as long as we know prior to editing. If you would like your flash drive/SD card returned, please include a postage-paid, addressed envelope to quickly and easily return it to you.
- Full-game videos: While we can capture or download short videos, or small sets of clips for editing, we cannot download entire games. It ties up valuable computer processing power and can take an exceptionally long time to complete the transfer. Full games need to be sent on disc or inexpensive flash drives/SD cards for editing. This speeds up the entire process for everyone.
HOW TO VIDEO BASEBALL/AND SOFTBALL
Here’s how to shoot your video. It’s important you follow this guideline to ensure you have a quality video that college coaches will more likely respond to.
IF USING A PHONE OR TABLET, MAKE SURE TO HOLD HORIZONTALLY
Tips
- Your edited video will show each skill in one shot with no cuts in between throws, swings, etc., because college coaches want to see you can do a skill consistently and it’s not 5 of 100 throws, for example.
- Do NOT submit video clips you do not want on your video.
- The numbers listed below for each skill will be on your video, so keep recording that skill until you feel you have enough good consecutive swings/throws to use on your video. If you need 5 of a skill and you like 4 of 5, that is fine. For example, you need 5 swings for hitting with a behind-the-plate angle. You foul off the first two pitches, then keep recording. You hit two solid line drives and then foul off two more, keep recording. You hit 3 solid line drives, hit one grounder and then another line drive, then stop recording. ScoutU will use the last 5 swings in that clip.
- Take your time and relax! If you’re tired, take a break.
Pitchers
- Film behind the pitcher AND catcher, so you can see the travel of the ball.
- Throw 3-5 of every one of your pitches (3 if throw 4 different pitches, 5 if 2-3).
- Throw around 5 total pitches where you can see your mechanics from the side view (arm/throwing side) in front of you.
Catchers
- First show film of receiving the ball. 5 pitches in a variety of locations.
- Show 5 examples of blocking. Make sure to include showing some to your left, middle and right as well as bouncing up and throwing the ball to second.
- Show different examples of throwing to first (2 throws), second (3 throws) and third (2 throws) with a variety of pitch locations. First, show some from the side to see footwork. Then, also some from behind so you can see the travel of the ball and get an accurate pop time. When throwing to third, film this with a right-handed batter in the box to show you know how to make the throw around the batter. When throwing to first for softball catchers, if you can make this throw from your knees as well as standing, make 2 throws with each technique. Baseball catchers should only make this throw standing.
- Fielding bunts: Have a coach set up behind you and toss balls out in front of you for you to field. Be sure the balls are thrown to all three locations – left, right and up the middle. Do 2 of each.
Infielders
- Show fielding ground balls of a wide variety. You should have some right at you, backhand, going towards first and charging. Do 2 each.
- Also show about 5 examples of throwing to first where you can see the travel of the ball (throwing to second/third for first basemen). Good angle is from behind 1B.
- Middle infielders: double plays (receiving/throwing to second and first). 1 of each.
- Third basemen: Field bunts, throw to first and second. 1 of each.
- First basemen: 3 stretches/scoops of poorly thrown balls.
Outfielders
- Just like infield but showing a variety of flyballs. You should have 3 right at you,
1 going back, 1 coming in and 1 ground ball. - Show 3 throws each from right field to third base and home and make sure the camera has the flight of the ball in view.
Hitting
- Soft toss or live in the cage/outdoor field is best.
- Show about 5-6 swings from behind where you can see the travel of the ball. Then about 5 swings from the side so you can see your hands, hips and overall mechanics.
- Bunting: If you’re a strong bunter, lay down 2 bunts each down the third-base line and first-base line.
Running
- If foot speed is one of your better tools, film running from the batter’s box to first. Camera should be positioned up the RF line. Softball: Do one on contact (swinging at pitch) and one just running. Baseball: Film a 60-yard dash from straight on if you can.
HOW TO VIDEO BASKETBALL
Getting quality video that college coaches will be able to properly evaluate you is not difficult! But following these few and simple steps can be important for a college coach to be able to properly evaluate you on video.
- If using a phone or tablet, make sure to hold it horizontally.
- If possible, use a tripod to keep it steady.
- Position yourself as close to the half-court line as possible. You’ll likely have to be higher up in the stands (or at a higher up position if there are no stands) to accomplish the next tip. If you can’t be at half court and have to be on a baseline, then zoom in/out on the side of the court the ball is on.
- When in half-court offense/defense, keep half the court in the frame, so coaches can see what you’re doing when you don’t have the ball/aren’t defending the ball. Do NOT zoom in on the player you are getting video of or any closer than half court.
- Keep the same zoom percentage as half court as you move the camera on transitions from offense to defense and vice versa.
- We know this one can be tough, but do not cheer loudly and keep quiet. We prefer to edit video with no music background (coaches usually just turn the volume down when it’s music anyway) and just have the natural game sounds in it. Cheering loudly right by the camera is distracting, so if you just can’t hold in your cheering during a big moment, try to get as far away from the camera as possible! If you want to be able to cheer freely, then have someone else take the video for you who can stay quiet.
HOW TO VIDEO GOLF
IF USING A PHONE OR TABLET, MAKE SURE TO HOLD HORIZONTALLY
Tips
- Videos should be 3-5 minutes maximum. Coaches won’t watch videos longer than that.
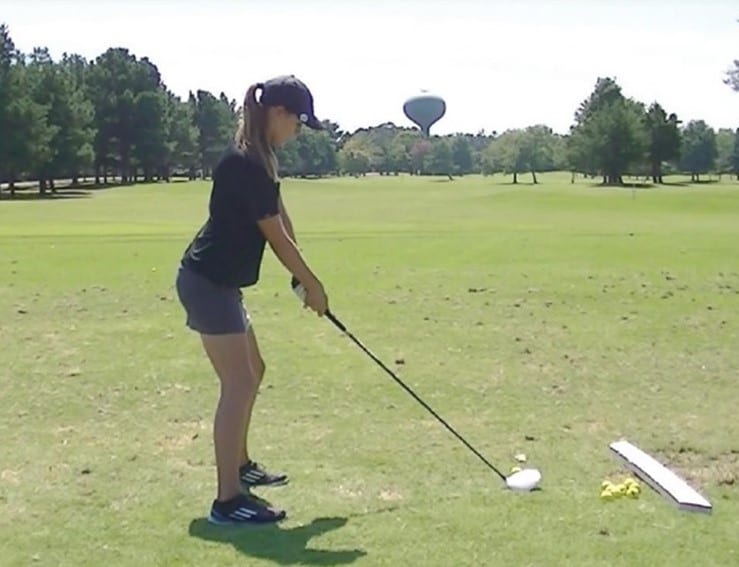
- Make sure you are zoomed out enough to see the top of the swing.
Driver and Irons (7-iron)
5 shots from behind the golfer.
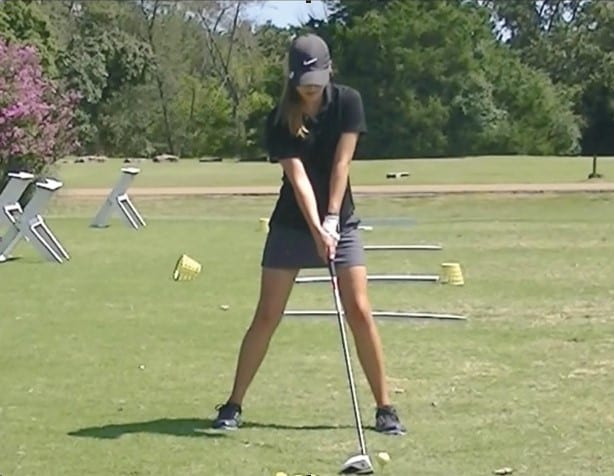
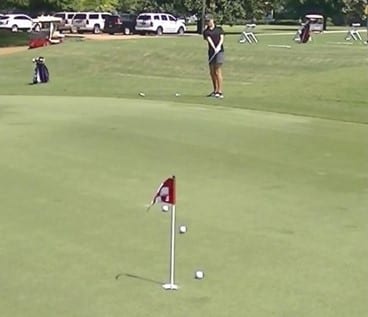
5 shots of each from behind the hole.


HOW TO VIDEO VOLLEYBALL
Getting quality video that college coaches will be able to properly evaluate you is not difficult! But following these few and simple steps can be important for a college coach to be able to properly evaluate you on video.
Shooting your video
- If using a phone or tablet, make sure to hold it horizontally.
- If possible, use a tripod to keep it steady.
- Position yourself on the base line on the side you are playing on. Get as close to center as possible. If possible/necessary, raise your camera/phone up with your tripod to get high enough to be above people that may walk by.
- Get the entire half of your side of the court in the frame.
- We know this one can be tough, but do not cheer loudly and keep quiet. We prefer to edit video with no music background (coaches usually just turn the volume down when it’s music anyway) and just have the natural game sounds in it. Cheering loudly right by the camera is distracting, so if you just can’t hold in your cheering during a big moment, try to get as far away from the camera as possible! If you want to be able to cheer freely, then have someone else take the video for you who can stay quiet.
What do college coaches want to see in your video?
- Middles: hit, block, handle a free-ball pass and serve
- Outsides: hit, block, pass, serve and dig
- Setters: setting in system and out of system (all sets, including entry footwork), dig, serve and block
- DS/Ls: pass, more pass, dig, serve and set
Attackers
- Arm speed and athleticism — How smooth do they move? How fast do they move from an explosiveness standpoint? How high do they reach while blocking and attacking?
- Defensive and serve/receive range
- Attacking range (shots/location, etc.)
- Foot speed
- Pass to attack
Passers
- Vision
- Defensive and serve/receive range
- Platform
- Serving ability
- More serve receive
Setters
- Hand mechanics
- Foot speed
- Serving ability
- Defensive range and mechanics
- Verbal cues
